There are lots of different reasons why you may want to remove the header and footer from a single page in Elementor. You may be working on a sales page with its own unique header, or maybe your standard footer is too long for a specific page, so you want to remove it entirely.
Whatever your reason, you’ll be pleased to know it’s super straightforward to remove the header or footer from any page on Elementor. In this quick tutorial, I’ll show you how!
I’ll be using your website’s header for both methods in this tutorial but you can apply the exact same methods to your footer template for the same results.
Let’s get into it!
Method 1: How to remove the header from a single page in Elementor
This method will only work if you have created your own custom global header with Elementor Pro using the Theme Builder.
We will be using the Display Conditions to remove the header from a single page.
If you have not created a global header and instead you’re using an Elementor-compatible WordPress theme for your header, you will need to follow method 2.
Follow these steps to remove your global header from a single page in Elementor.
Step 1: Locate your Header template

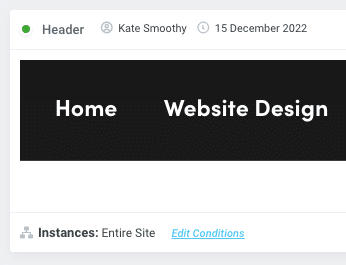
Head to Elementor u003e Theme Builder on your WordPress dashboard and locate your global header.
Step 2: Click u0022Edit Conditionsu0022
Next to Instances: Entire Site, click on the blue u0022Edit Conditionsu0022 link.
Step 3: Select Exclude

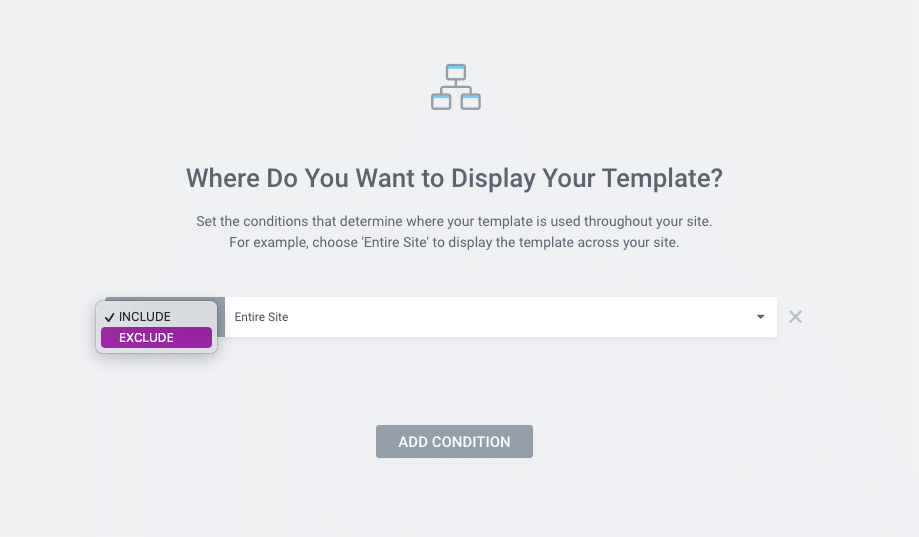
In the grey box, click on u0022Includeu0022 and change the setting to u0022Excludeu0022.
Step 4: Select Singular

Once you have set u0022Excludeu0022, change u0022Entire Siteu0022 on the right hand side to u0022Singularu0022.
Step 5: Set the page you want to exclude the header from

Finally, select whether it is a page, post, custom post type, etc. and you will be able to search for the specific page in the last box. Once you have added your page, click the green u0022Save u0026amp; Closeu0022 button on the bottom right.
Method 2: How to remove the header from a single page in Elementor
In this method, we’ll be doing some sneaky little design hacks to hide your theme’s header on a single page.
Step 1: Open your single page in Elementor
Locate the single page and click “Edit with Elementor”.
Step 2: Select the top section

Step 3: Click the Advanced design tab

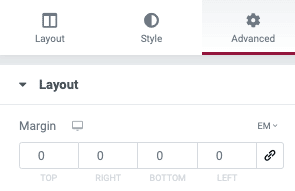
On the left-hand side, select the Advanced tab.
Step 4: Apply a negative margin

You will need to play around with this number depending on the size of your theme’s header.
Step 5: Apply z-index

Finally, apply a z-index of “9999” to tell the page to let your Section or Container take the authoritative position. If you noticed certain elements of your header were still showing, this z-index trick should resolve it!
If you want to use this method to remove the footer from a single page in Elementor, you will need to apply a negative bottom margin to achieve the same result.
Want to learn how to use Elementor like a pro?
Sounds like you need The WordPress Hive! In this step-by-step WordPress & Elementor course, you will learn how to build your WordPress website from the bottom up. Click here to learn more about The WordPress Hive!